When we moved this past fall, we left a lot of our furniture and wall decor in our house to stage it for potential buyers. This included our master bedroom furniture, which was no problem for me since I wanted new stuff anyway. The problem is, we still have not sold our home, so there are no extra funds to purchase furniture or decorate. Which then presents the problem of feeling like I’m living in a temporary situation and having a difficult time feeling settled in our new city. Not to worry, my husband and I love a good DIY project and challenge. Being able to make the most of what we have is a trait we desire to pass on to our children.
When we moved in, we hit it off with our neighbors right away. It was such a blessing, and then they told us they were moving. Major bummer. In their process of moving, they told us that there was a bunch of wood in the backyard that they needed to get rid of if we wanted to use it for fire wood in our backyard pit. Turns out, it was a bunch of 4 foot fence slats. Forget the firewood! These are perfect for DIY projects. We made a coat hook for our foyer, and wall decor to hang pictures on, but my favorite was the headboard. I’m in love with this thing!
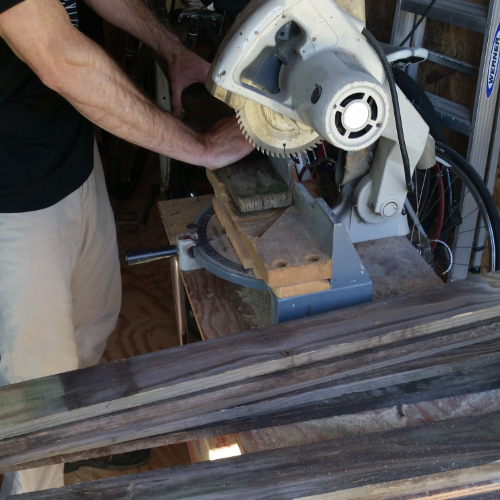
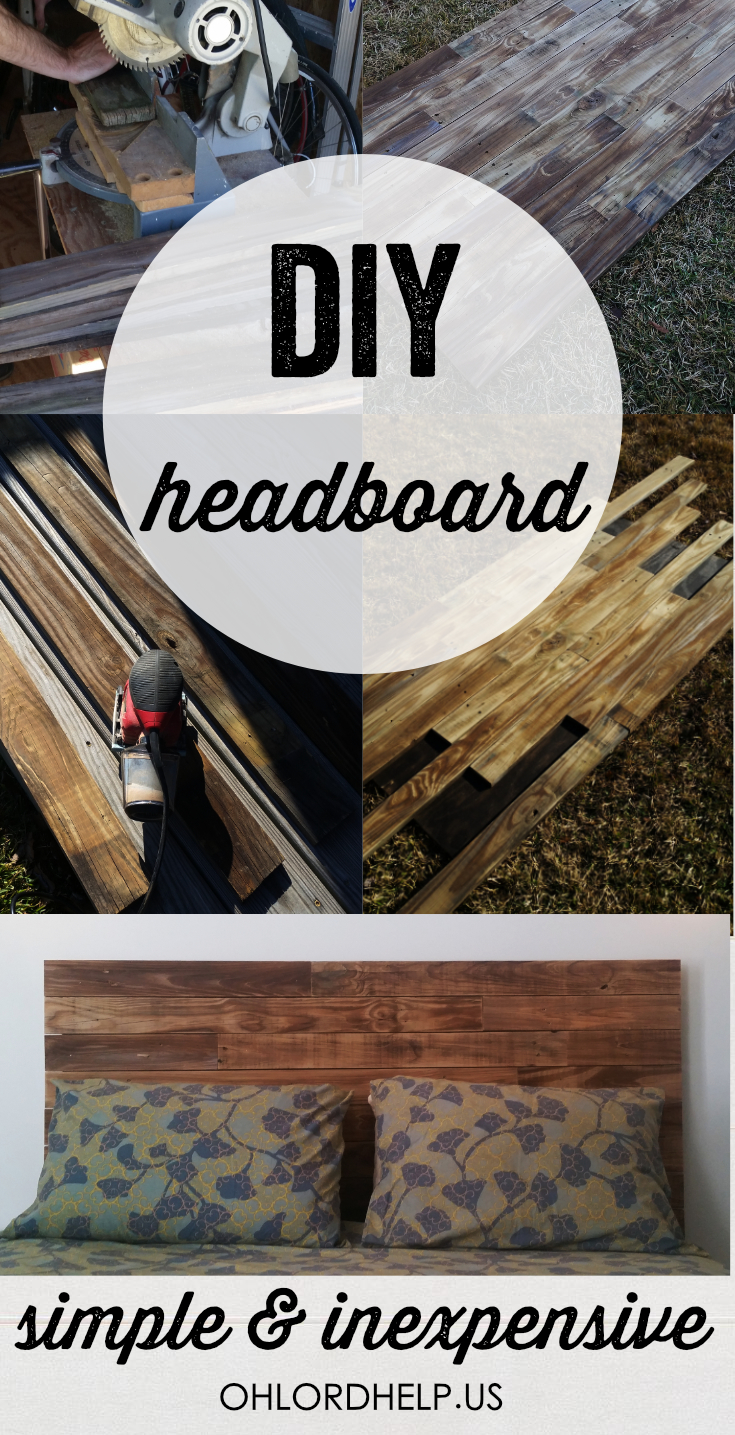
First, we selected boards that were straight. Then cut of any ends that were damaged and made sure they were square.

Next, we cut a piece of plywood a few inches smaller than the dimensions we wanted for the headboard and stained it so the lighter wood would not show through any of the seams.
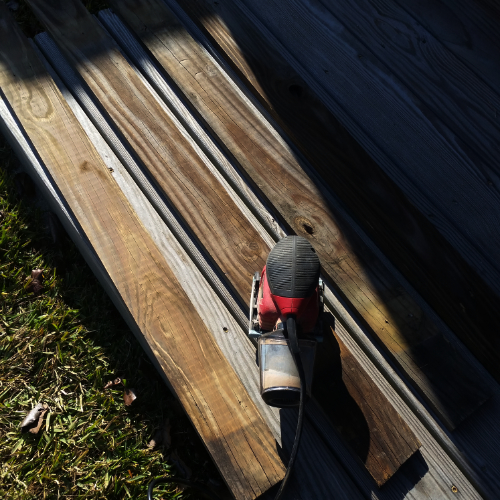
Then, we sanded each board to make them smooth and to get the dirt off. We were originally planning on staining the slats, but after sanding them they were naturally a beautiful color with interesting grains throughout.
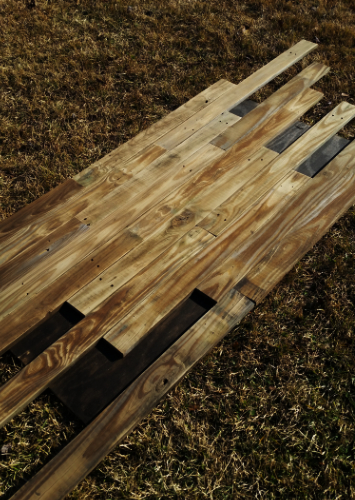
We laid out the boards to get an idea of what pattern we wanted and to mark lines of where to cut.
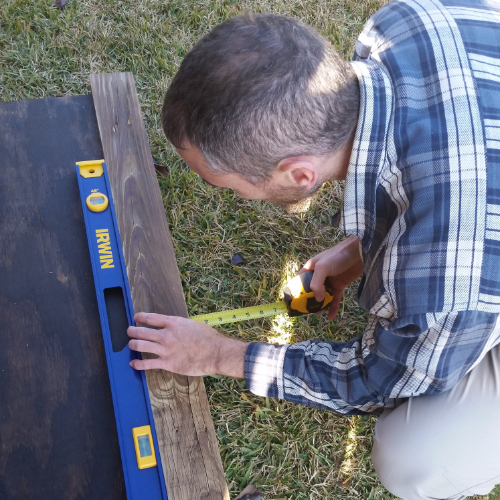
Measured and made sure the slats were level, as well as overhanging the plywood an inch or so.
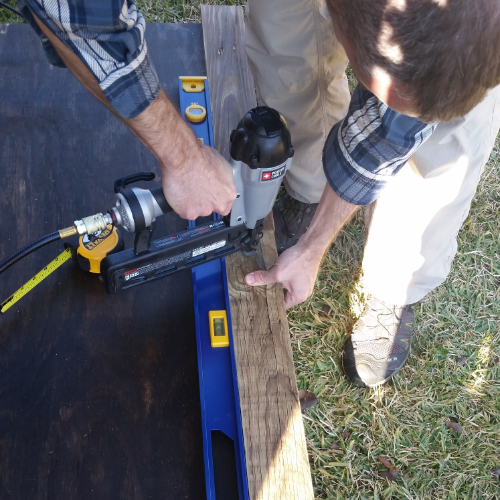
Yay for nail guns! (Please use caution!)
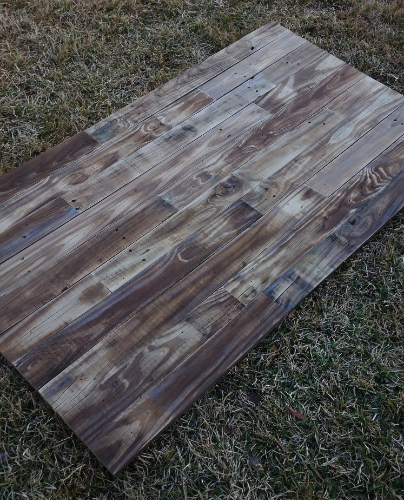
All the slats nailed on.

What we did not take into account before hand was screwing the legs on. My husband ended up removing some of the slats, screwing the 2 x 4’s on, and then nailing the slats back on. He didn’t want to risk screwing them on from the back and the screw messing up the slats. Also, the headboard could have been attached directly to the wall, but we did not want to do that. The 2 x 4’s were bolted to the bed frame.
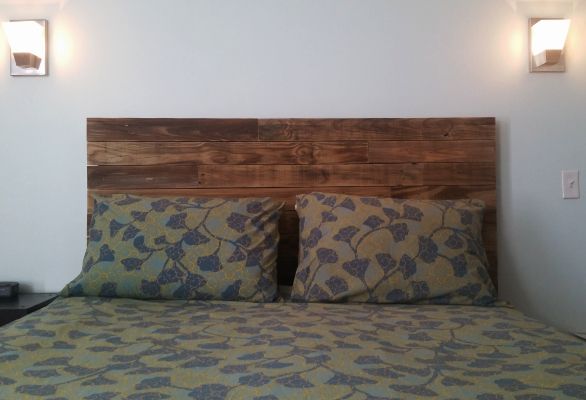
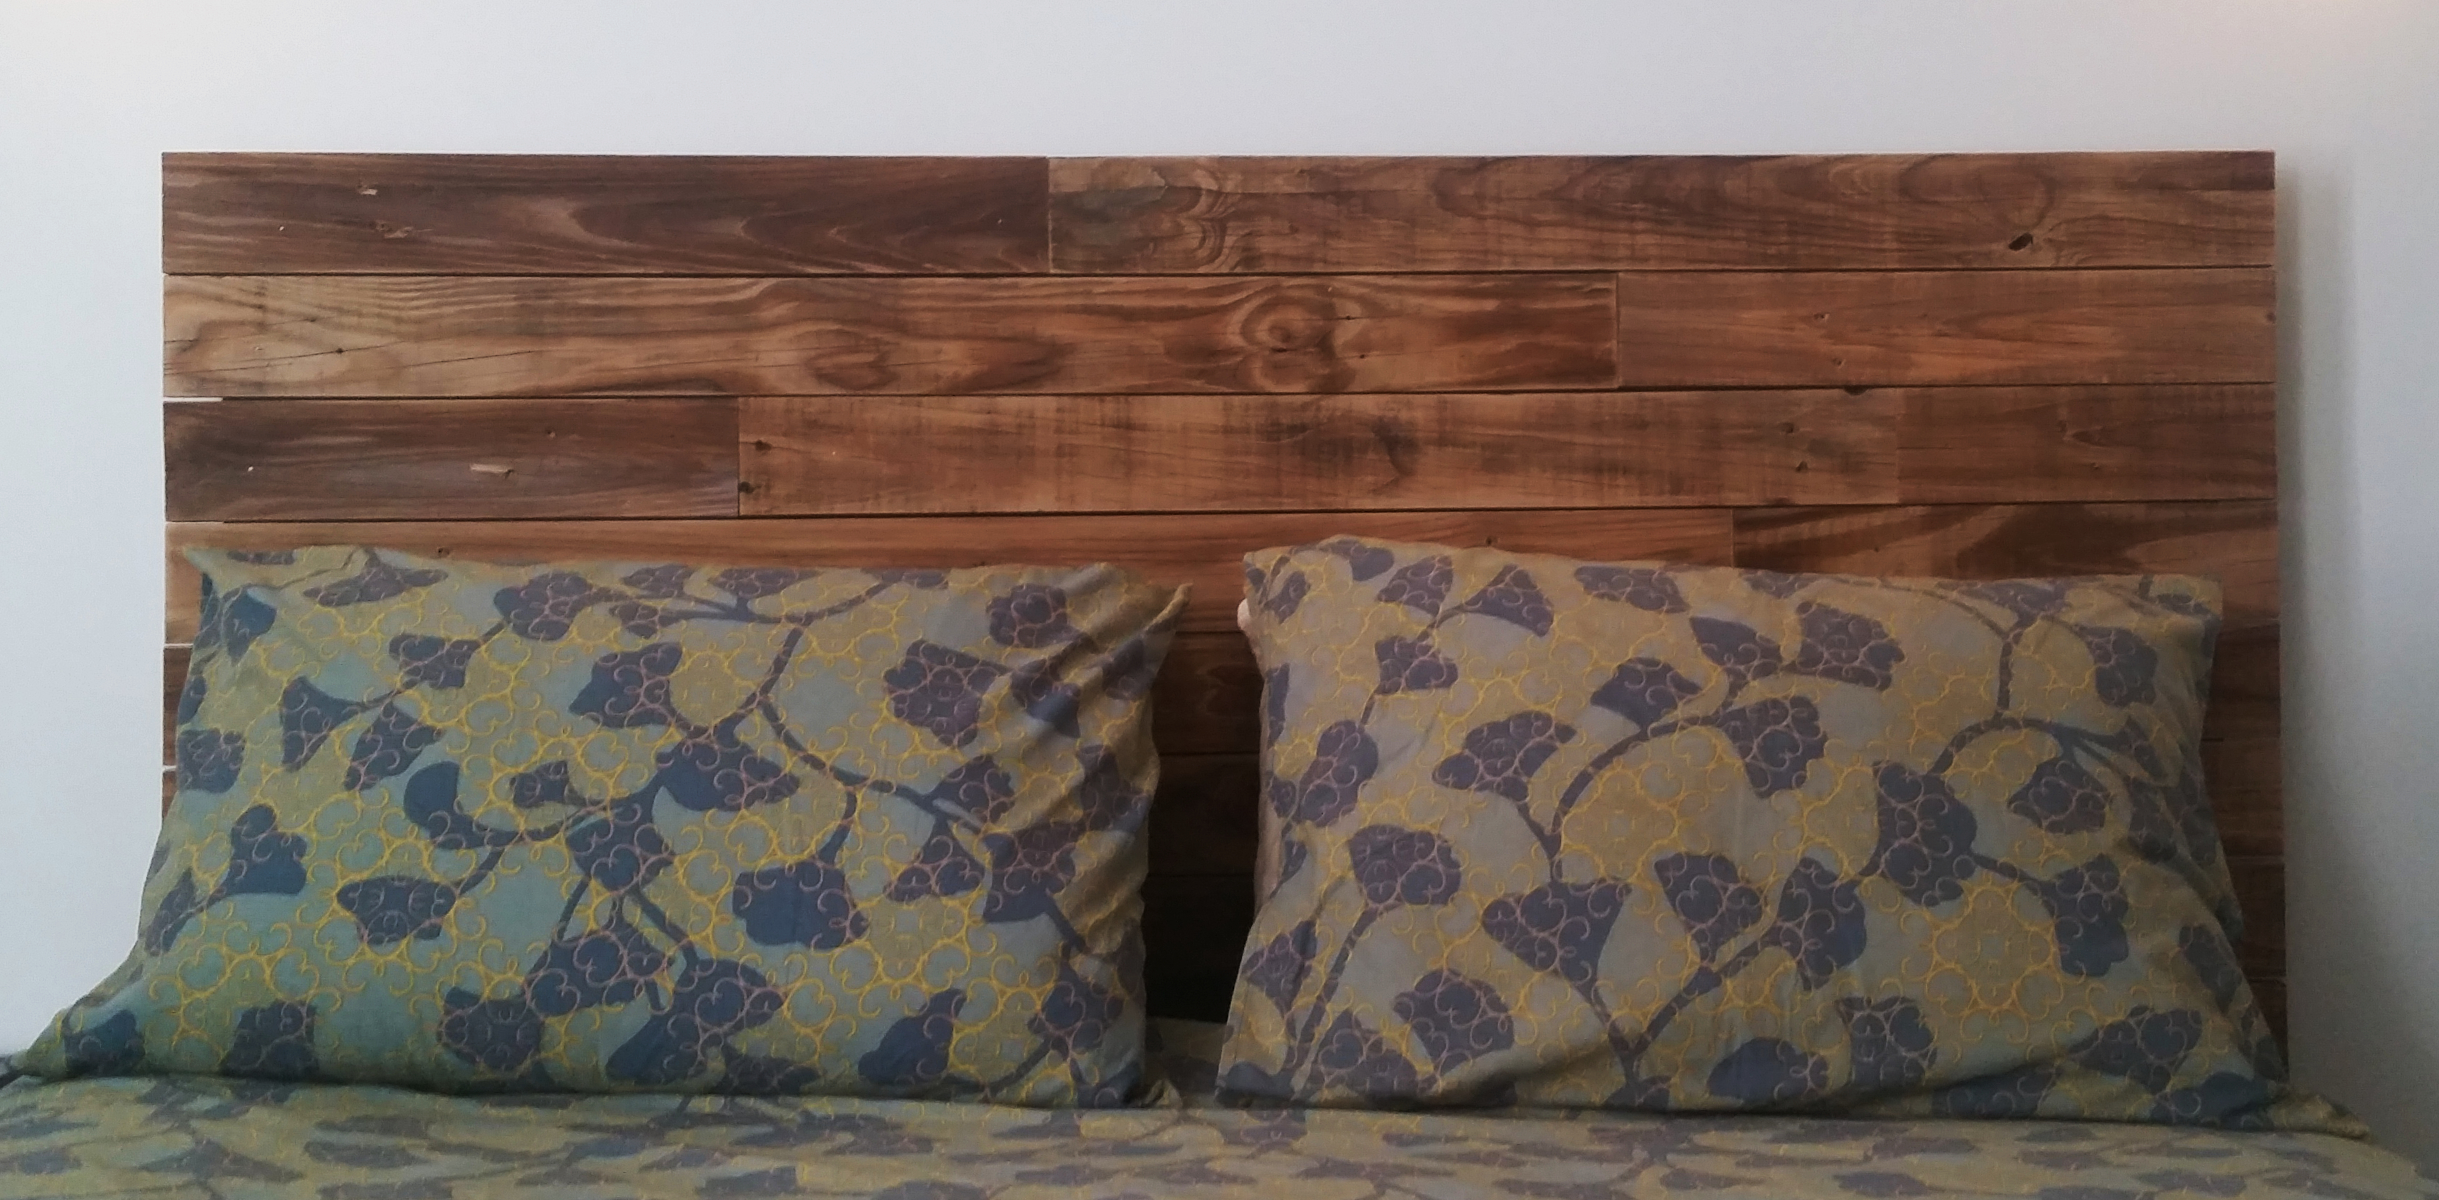
All done! Isn’t it great?!?
We were able to use what was given to us, and make the most of what we had.
I’m thankful to do life with a man who understands being flexible and using creativity to make life better.


Love it! ❤
Love this Rachael. I have so many pieces to either repurpose or refinish. Just waiting on God’s timing to provide the right season to do so. Beautiful work. Well done.
Thank you both!!