Letting Go of the Meal Plan

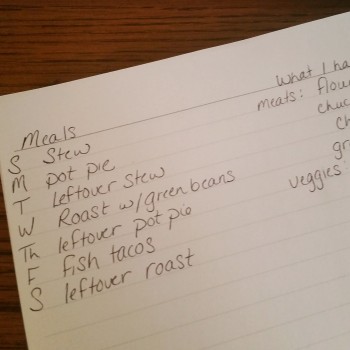
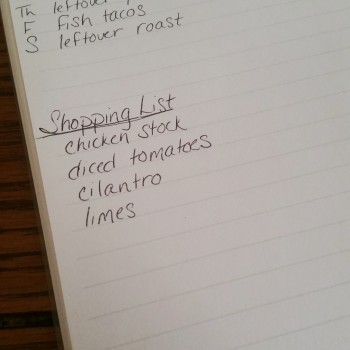
I have just spent the past hour prepping all my meals for this upcoming weak. At this moment, I have okra and chicken soup in the crockpot, a meatloaf prepped and ready to go into the oven tomorrow afternoon, and a pot of pumpkin chili that will be reheated later in the week. My house is smelling real good right now!

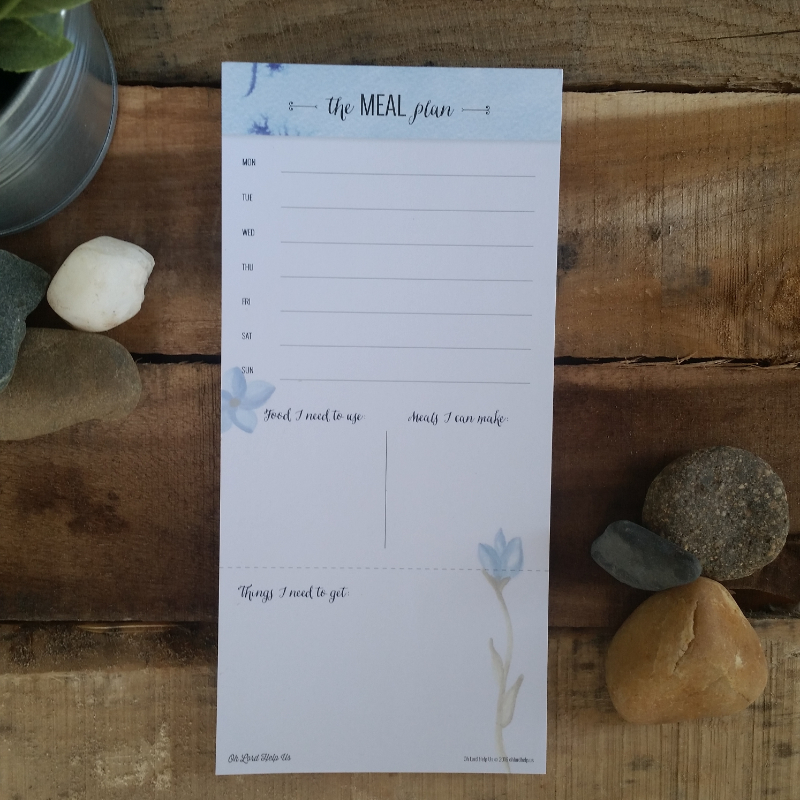
Over the past couple of years I have become a huge fan of meal planning and a weekly meal prep time for these reasons:

  • It saves our family money because I use all the food we buy.
  • It saves me a ton of time because I don’t have to cook during the week.
  • It is healthy because by choosing meals ahead of time we are less likely to eat processed foods.

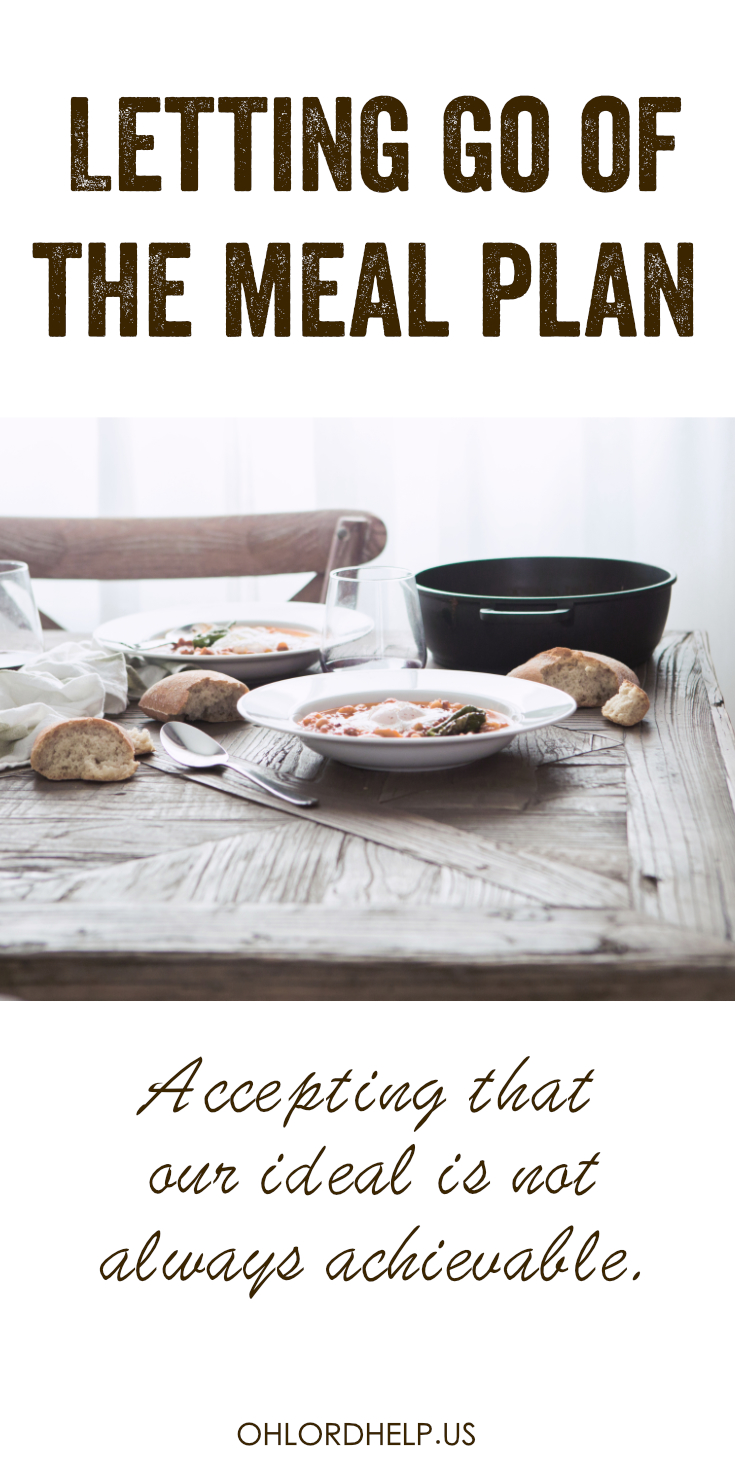
Sometimes, however, the best laid plans end up flying right out the window!

To be honest, I have become completely dependent on meal prepping ahead of time. So much so, if I have not done my prep work, then there is a good chance there will be NO dinner. One afternoon a couple weeks ago, I just simply forgot to make dinner. I had food that I could have made, but the meat was frozen and it required too much prep time. I even had it written down on my handy meal plan pad what I was going to make. The problem was, it was a crock pot meal. You can’t start a crock pot meal at 5 in the evening!!

meal-plan

Along with a scattered brain due to our lives being in upheaval because of the move, our healthy eating pretty much dissolved away also. You want frozen pizza? Sure! You want Chick-fil-a (again)? Sure! You want cereal for dinner? Sure!

Want to know what this ultra-organized-marathon-running-healthy-eating momma served my kiddos the night I forgot to make dinner? Frozen shrimp and baby carrots. Gross. It was so greasy. And who serves carrots with shrimp? I was trying to salvage it, I suppose.

But you know what? My boys thought it was great! They get excited when I throw together some ridiculous meal. They say things like, “Mom, you’re the bestest ever!” Seriously, this is what they think. All the while I’m thinking, “What is my problem? How can I forget to make dinner for my family? I’m such a slacker!” If only we could see ourselves through the eyes of our children.

So yes, meal planning and prepping works for me. I’m thankful to be back at it now because it does help me feel calmer and more organized. But sometimes it is just not realistic. Sometimes, I’m simply thankful that we have food period. My children are fed and cared for. And it is all good!

What is the craziest thing you have thrown together for dinner?

dinner

Simple Homemade Laundry Detergent

In my continued effort to gradually remove unnecessary chemicals from our home, I have started to make my own laundry detergent. And since I need for things to be simple and inexpensive, this is what I make.


laundrydetergent


I grew up in a Tide® home, so naturally that is what I used when I moved out, and then started washing laundry for my own family. Not any longer. Here are the ingredients in Tide® Ultra as well as what it’s purpose is and the concerns for those ingredients.

  • Sodium Carbonate: removes water hardness. No concern.
  • Sodium Aluminosilicate: removes water hardness. No concern.
  • Sodium Sulfate: processing aid. No concern.
  • Linear Alkylbenzene Sulfonate: surfactant. Shown to be toxic to aquatic life.
  • Alkyl Sulfate: surfactant. Shown to be toxic to aquatic life, and cause skin irritation.
  • Sodium Percarbonate: oxygen bleach. No concern.
  • Sodium Polyacrylate: dispersant. Shown to be very toxic to aquatic life.
  • Silicate: processing aid. Shown to be moderately toxic to aquatic life.
  • Nonanoyloxybenzenesulfonate: bleach activator. No known concern, no available data.
  • Ethoxylate: surfactant. High level of concern with causing infertility, and damage to the unborn child. Known to be a human carcinogen. Known to cause respiratory issues such as asthma.
  • Polyethylene Glycol (PEG) 4000: stabilizer. Interesting that there is no data available. PEGs are notoriously common carcinogens and known to cause reproductive issues.
  • Fragrance: fragrance. Bad for the environment, bad for skin, bad for neurotoxicity of mice. Your clothes may smell good, but you’ll act crazy.
  • DTPA (Pentetic Acid): chelant. Low toxicity to aquatic life.
  • Disodium Diaminostilbene Disulfonate: whitening agent. This is not degradable in the environment.
  • Palmitic Acid: processing aid. No concern.
  • Protease: stain remover. No concern.
  • Silicone: suds suppressor. Not enough data.
  • Cellulase: stain remover. No concern.

Now since there is a good chance you just skimmed over all those chemicals and scientific terms, let me point this one out to you again…

Ethoxylate: surfactant. High level of concern with causing infertility, and damage to the unborn child. Known to be a human carcinogen. Known to cause respiratory issues such as asthma.

Good grief!! Are you kidding me?!?!?!

Now, there are a lot of homemade detergents that include Fels Naptha and Borax. I did use this recipe for some time, until I read more about them.

  • Fels Naptha: Ingredients have potential for carcinogens, and respiratory complications.
  • Borax: Has high concern for reproductive, endocrine, and developmental complications.

So now, I make a very simple laundry detergent that I feel good about, and it is inexpensive!


Simple Homemade Laundry Detergent

Ingredients

  • 1 bar Dr. Bronners castille soap (I prefer lavender) $4.69
  • 1 cup washing soda $0.75
  • 1/4 cup baking soda $0.07
  • 1/4 tsp kosher salt $0.01
  • 20 drops lemon essential oil (I like the lavender and lemon together) $.80

Total: $6.32 for approximately 36 loads, $0.18/load (Tide is $9.99 for 40 loads, $0.25/load)

Directions

Step 1: With a food processor or cheese grater, shred bar of soap.

20160427_085154-01


Step 2: Combine all ingredients in the food processor and pulse until fine powder is produced.

laundrydetergent2


To Use: 1 Tablespoon per load.

20160427_090017-01


Notes:

  1. I use a dosage cup from a children medicine bottle for ease of measuring.
  2. This is safe for high efficiency machines.
  3. If it is a particularly stinky load (technicals or towels), I will add a 1/4 cup baking soda directly in the wash basin and 1/4 cup white vinegar in the fabric softener basin.


Click image to save to Pinterest

laundrydetergent


Where I found my information:

https://www.pg.com/productsafety/ingredients/household_care/laundary_fabric_care/Tide/Ultra_Tide_Powdered_Detergent_Original.pdf
http://www.ewg.org/guides/cleaners/1809-TideUltraPowderDetergentOriginal
http://www.ewg.org/guides/substance_groups/42
http://www.ewg.org/guides/substance_groups/184
http://www.ewg.org/guides/substances/5654
http://www.ewg.org/guides/substances/5426
http://www.ewg.org/guides/substances/151906
http://www.ewg.org/guides/substance_groups/230
http://www.bio-world.com/msds/41600044/PEG-Polyethylene-glycol.html
http://www.ewg.org/guides/substances/2290
http://www.ewg.org/guides/substances/12483
http://www.ewg.org/guides/substance_groups/68
http://www.ewg.org/guides/substances/5426
http://www.ewg.org/guides/cleaners/441-FelsNapthaHeavyDutyLaundryBarSoap
http://www.ewg.org/guides/cleaners/2507-20MuleTeamBoraxNaturalLaundryBoosterMultiPurposeHouseholdCleaner


Simple Homemade Deodorant

In the past 6 months I have had more conversations about deodorant than most people probably have their entire lives. What a strange topic of conversation. “Hey, have you tried this deodorant? Do your pits smell? Do you sweat excessively?” I’m a blast at parties, let me tell ya. Just so you know, I’m not completely crunchy. I’m maybe chewy with a crunchy center.

It started to bother me that anti-perspirants/deodorants actually do what they say. Our bodies are suppose to sweat. Is it awkward sometimes? Sure. But what is happening to our insides when we block up all that sweat? And what are these chemicals that we are applying to a very porous part of our bodies?

There are studies saying aluminum in deodorant is evil, and studies saying that it’s perfectly fine. Who do we believe? I think that if I can make a choice to eliminate the concern (and save some money) then that’s what I’m going to do.

You decide for yourself.

To help I have broken down the ingredients for a popular anti-perspirant/deodorant and also included my recipe for a homemade deodorant that is simple to make, and of course inexpensive.

Ingredients in Secret Original Invisible Solid

  • Aluminum Zirconium Trichlorohydrex Gly: There are several different types of aluminum used in different brands. They block the pores to reduce perspiration.
    There is thought that the aluminum is linked breast cancer. I also wonder if the toxins being blocked in the body could be linked to this (I have not been able to find a study stating one way or the other). There is also thought that the aluminum absorbed into the skin is linked to Alzheimer’s disease.
  • Cyclopentasiloxane: A skin conditioner.
    One or more animal studies have shown tumor formation at moderate doses. Has also shown to be possible endocrine disruption, neurotoxicity, and an environmental toxin.
  • Stearyl Alcohol: An emulsifying agent.
    Possible skin irritant, environment toxin.
  • C12-15 Alkyl Benzoate: Skin-conditioning agent.
    Possible environment toxin.
  • PPG-14 Butyl Ether: Skin-conditioning agent.
  • Hydrogenated Castor Oil: Skin-conditioning agent.
  • Petrolatum: Skin-conditioning agent.
    Considered to be toxic and harmful to humans.
  • Phenyl Trimethicone: Skin-conditioning agent.
  • Talc: Absorbent.
    Has been linked to different types of cancer.
  • Cyclodextrin: Absorbent.
  • Fragrance: To make us smell good.
    The FDA allows this on the product label to represent an undisclosed mixture of various chemicals and ingredients. They have been associated with allergies, dermatitis, respiratory problems and possible effects on the reproductive system.
  • Mineral Oil: Skin-conditioning agent.
    Possible human immune system toxicant or allergen.
  • Behenyl Alcohol: Binder.

Now you might be thinking, “This chic has lost her mind. There is no way I’m going to stop using my store-bought deodorant.” And that’s cool.

Or you might be thinking, “What else can I do?” Well, this is the recipe my husband and I have been using for several months now (we thought it best to experiment with this together) and we have no intention of going back.

Some things I want to be upfront about:

  • I first made some with benzonite clay, but I felt like it was making me stinky, so I made some without. It was better, and then shortly after I received a notification saying that the kind I had purchased had been contaminated with lead and to throw it out (I was refunded). So make sure you research where your stuff is coming from.
  • I also used tea tree oil at first. It got to where I couldn’t tell if I was stinky, or if it was the oil. That doesn’t work for me, so I switched to lavender and haven’t had any problem since.
  • I used an old deodorant container to hold my new stuff. I discovered there were holes in the bottom after I scraped out the old stuff, so I put some masking tape in the bottom so the new stuff wouldn’t pour out the bottom.
  • This deodorant is really only good for a day. Max. So if you are not planning on showering every day, then you at least have to wash your pits. Please.
  • I have not been able to tell a difference in my perspiration. Of course, summer is just beginning.
  • One day I saw a friend while I was out running, and I ran up to hug her. We were both sweaty, so she didn’t mind. She actually told me I smelled good. True story.

Simple Homemade Deodorant

Ingredients and Price Breakdown

  • 1 Tb Coconut oil $0.14
  • 1 Tb Shea butter $0.47
  • 1 Tb Beeswax $0.22
  • 1.5 tsp Baking soda $0.01
  • 1.5 tsp Arrowroot powder $0.06
  • 4 drops Lavender essential oil $0.13

Total: $1.03 for approximately 2 oz.

Step 1:

Place coconut oil, shea butter, and beeswax in either a pot to melt on the stove, or in a glass dish to melt in the microwave. It takes about a minute to melt in the microwave. The beeswax is last to melt.

20160314_090150-02

Step 2:

Add baking soda and arrowroot powder.

20160314_090605-02

Step 3:

Stir and add essential oil.

20160314_090653-02

Step 4:

Pour into the container. Be sure to have the container ready and close by. It will start to solidify quickly!!

20160413_113554-01


Let me know what you think!

Want to try this later? Then Pin it!!

SimpleHomemadeDeodorant


Where I got my information:
http://secret.com/en-us/original-invisible-solid
https://www.ewg.org/skindeep/ingredient/701741/CYCLOPENTASILOXANE/
https://www.ewg.org/skindeep/ingredient/706325/STEARYL_ALCOHOL/
https://www.ewg.org/skindeep/ingredient/700898/C12-15_ALKYL_BENZOATE/
https://www.ewg.org/skindeep/ingredient/705247/PPG-14_BUTYL_ETHER/
https://www.ewg.org/skindeep/ingredient/702919/HYDROGENATED_CASTOR_OIL/
https://www.ewg.org/skindeep/ingredient/704786/PETROLATUM/
https://www.ewg.org/skindeep/ingredient/704817/PHENYL_TRIMETHICONE/
https://www.ewg.org/skindeep/ingredient/706427/TALC/
http://www.cancer.org/cancer/cancercauses/othercarcinogens/athome/talcum-powder-and-cancer
https://www.ewg.org/skindeep/ingredient/701732/CYCLODEXTRIN/
https://www.ewg.org/skindeep/ingredient/703977/MINERAL_OIL/
https://www.ewg.org/skindeep/ingredient/700659/BEHENYL_ALCOHOL/
https://www.ewg.org/skindeep/ingredient/702512/FRAGRANCE/#

Antiperspirants – Aluminum & Alzheimer’s Disease

Antiperspirants – Aluminum & Breast Cancer

DIY Wall Art

A few weeks ago, I shared with you how I re-used old curtains in my little girl’s room. Well, part of the remodel of her room included adding some artwork to her walls. I love being able to make my own artwork. It saves quite a bit of money, and I have the pride and satisfaction of knowing I made it myself.

My daughter’s name means “Bright Light,” so of course I wanted to incorporate the lyrics of “You are My Sunshine” into the art. I love when people create artwork that is hand-painted words, but I do not possess this talent. So here is how I “cheated” to make this artwork look like it wasn’t done by a three year old.


sunshinecomplete

First, I found a set of canvas panels at Hobby Lobby and I bought some acrylic paints.

sunshinepaint

I thought I wanted grey for the background, but then decided it was too dark.
That is the beauty of paint! Just cover it up with a different color.

sunshinepanels

Here is the “cheating” part. Find a font you like, type out your words, and print it reversed. Then take a soft-lead pencil and heavily trace over the print out. Lay print text side down over canvas, and rub the back of the paper with a blunt object. I used a bone folder, but a spoon would work just as well. Voila! You have just done a graphite transfer.

sunshinetransfer

Then, just simply paint over the transfer. I added some daisies for fun, too!
Put them in frames (if you want) and hang them up!

sunshineindividual

Do you want to try this at some point? Pin it!

 Pin-DIY-WallArt

How to Reuse Old Curtains

When the little girl was born, we actually had her set up in my closet. I know that sounds funny, but my closet is about the same size as my oldest son’s first bedroom. I loved having her in there. It was close so I could hear her, but not right next to me so I wouldn’t wake up with every little grunt. But alas, the time came to move her alllllllll the way down the hall, so far away from us.

This room was originally my second son’s room. We moved our two boys into the same bedroom last April to make room for the baby, and eventually for the children we adopt. I had put off redecorating the room, because I was unsure of what our sleeping arrangements would be, since I’ve been unsure of what our children situation would be. But the time came. I couldn’t put it off any longer. We painted the room a pale yellow, and accented it with warm grays, browns, and mint green.

Existing in the room was black, blackout curtains. They do a decent job of blocking the sun, but they are not so pretty and definitely did not go with my color theme. Since I was able to find the perfect fabric, I decided to revamp the blackout curtains. This way they were pretty, blocked the sun, and I didn’t have to waste perfectly good blackout curtains. They’re expensive!!


20160315_195649-01


How To Do It

Let me start by saying, I am NOT a seamstress. I know how to make my sewing machine needle go up and down. And I can change the bobbin by looking it up in the manual. Every. Single. Time. So if I can do this, you can do this, provided you also have a sewing machine you know how to make work.


This is one of the panels. Ugly, right?
I mean, I never even bothered to get the wrinkles out of it.

20160112_171035-01

I used 2 1/2 yards of fabric per panel, leaving plenty of extra at the top and bottom.

curtains2

Fold over the edge, just a little, and iron. Do this on all four sides.

curtains3

Sew (aka, make the needle go up and down) all four sides.

curtains4

Lay panel on top of fabric.
Fold over edges, pin, and iron.
I used a towel on the floor for this part,
that way I could keep it smooth and flat.

curtains5

Sew the two long sides.

curtains6

Fold over top and bottom approximately 3 inches,
or enough space to slide the curtain rod.

curtains7

Sew along top and bottom.
Don’t forget to leave enough room for the rod!!

curtains8

Iron out those wrinkles!!

curtains9

Voila!!
Nothing fancy, but I’m super happy with how they turned out.

curtains10


Simple Homemade Toothpaste

I worked as a dental hygienist for 15 years. And I have got to tell you, ever since I’ve started using this homemade toothpaste, my teeth have never felt so clean.

I’m going to share with you my toothpaste recipe, but first I’m going to bore load you up with a bunch of information. Why would I do that? Because I think you can handle the truth. And I think knowledge is power (although ignorance is bliss). And I want you to be healthy and to save money!


toothpastetitle


You may be wondering, “What’s wrong with store bought toothpaste?”

Several of the ingredients are questionable. And some are just not necessary. They are added to make it smooth, or make is sudsy, or make it a pretty color. There is no therapeutic value.

Fluoride is the only active ingredient in toothpaste and it’s the only required ingredient for toothpaste to receive the ADA seal. As a dental hygienist I’m torn on this one. I’ve seen improvement in people’s teeth (less decay and sensitivity) from using prescription strength fluoride at home, and administering it in the office. As an individual that does not like things being forced on me, I think water fluoridation is wrong. And kind of creepy, actually. As an individual that is continually striving to learn and to be healthier, the risks of fluoride being a carcinogen and having negative effects on our neurological health greatly concern me. Ok, enough about that…

Now let’s look at the inactive ingredients in the two top selling brands.

Colgate Total

  • Hydrated Silica: An abrasive to clean the teeth and give toothpaste a smooth consistency.
  • Glycerin: A humectant, solvent, and sweetener.
  • Sorbitol: A sugar substitute that can be used as a laxative, humectant, and thickener.
    It may aggravate IBS.
  • PVM/MA Copolymer (Polyvinyl methyl ether/maleic acid): A binder.
  • Sodium Lauryl Sulfate: A foaming agent.
    Possibly carcinogenic to humans. May also cause negative effects in the kidneys, liver, and central nervous system.
  • Cellulose gum: A thickener and emulsifier.
  • Flavor: (Good luck trying to figure out what they actually use to flavor that flavor.)
  • Sodium Hydroxide: Another name for lye. Used to neutralize the pH of the other ingredients.
  • Carrageenan:  A thickener and stabilizer.
    It has been linked to inflammation, gut irritation, and cancer.
  • Propylene Glycol: A humectant, solvent, and preservative.
    May be linked to allergic reactions in patients with eczema and other skin allergies.
  • Sodium Saccharin: An artificial sweetener. At one time it was thought to be carcinogenic, but further studies have disproven this.
    It may, however, cause allergic reactions, increase risk for developing diabetes, and contribute to weight gain.
  • Titanium Dioxide: A whitener used to prevent discoloration.
    Is a possible carcinogen and can be harmful to the brain.


Crest ProHealth Inactive Ingredients

  • Glycerin: same as above
  • Hydrated Silica: same as above
  • Sodium Hexametaphosphate: A corrosion inhibitor.
    Has been shown to cause skin irritations.
  • Propylene Glycol: same as above
  • PEG 6: A binder and humectant.
    Has not shown to be carcinogenic in of itself. The problem is that it makes other questionable ingredients more easily absorbed into the body.
  • Zinc Lactate: Used to prevent plaque formation and gingivitis.
  • Trisodium Phosphate: A chemical found in cleaning products.
    (I guess if your teeth are really dirty…? All these chemicals are getting old.)
  • Flavor: same as above
  • Sodium Lauryl Sulfate: same as above.
  • Sodium Gluconate: Used as a stabilizer when cleaning metals.
    (Good grief. This is maddening. Are you still with me?)
  • Carrageenan: same as above
  • Sodium Saccharin: same as above
  • Polyethylene: Plastic. Just plain old plastic.
    (Why?? I’m so angry. I don’t want to finish.)
  • Xanthan Gum: A thickener and emulsifier.
  • Mica: Used as an abrasive.
    (This mineral is also used when filling cracks in drywall. I’m becoming delirious now.)
  • Titanium Dioxide: same as above
  • Blue 1: (Because what’s one more chemical?)


Were you able to follow along? Are you angry? Depressed? Don’t really care, because you really like the taste of that blue plastic toothpaste?

Now let me talk about the ingredients I use in this simple homemade toothpaste.

  • Coconut oil: Prohibits growth of bacteria.
  • Baking soda: Mild abrasive.
  • Essential oil: I prefer to use peppermint. For the children I use spearmint since it is safe for them. (Please do research on what essential oils you use!)
  • Xylitol: This is a wonderful natural sweetener. I use this in the children’s toothpaste to make it sweeter. Here’s my simple-dental-hygienist way of explaining sugar, cavities, and xylitol:

The bacteria in your mouth eat the same sugars you do. Then they metabolize it, meaning they poop. This bacteria by-product is an acid that can burn a hole in your tooth. This is a cavity. But when the bacteria eats the xylitol, they can’t metabolize it. They get constipated. And then they die. Yay!


Simple Homemade Toothpaste

Ingredients and costs

  • 1 Tb coconut oil $0.14
  • 1 Tb baking soda $0.01
  • 5 drops essential oil $0.25 (price depends on what oil you use)
  • 1/4 tsp xylitol (optional)

Total: $0.40 per ounce
(Colgate Total is $0.41 per ounce and Crest ProHealth is $0.98 per ounce at Walmart)

toothpaste1

If you are using the xylitol, and it’s not in powder form, you will need to melt it in 1/4 tsp water first. Simply place xylitol and water in glass dish in the microwave for 15 seconds. Then add remaining ingredients and stir. Based on your preference, you may want to adjust the amount of ingredients.

toothpaste2


toothpaste3

Notes:

  • I make small batches so it does not get dried out.
  • I keep the toothpaste in small glass jars (with a lid) and dip it out with the toothbrush.
  • Yes, it tastes salty.
  • Yes, my children use it, as well (after complaining a couple times).

Yay for clean teeth!!


Here is where I found my information:

www.cancer.org/cancer/cancercauses/othercarcinogens/athome/water-fluoridation-and-cancer-risk
www.hsph.harvard.edu/news/features/fluoride-childrens-health-grandjean-choi/ www.practicalgastro.com/pdf/November10/ErfaniArticle.pdf
www.ewg.org/skindeep/ingredient/705417/PVM%3B%3B_MA_COPOLYMER/
articles.mercola.com/sites/articles/archive/2010/07/13/sodium-lauryl-sulfate.aspx
www.healthline.com/health/food-nutrition/cellulose-gum
www.prevention.com/food/healthy-eating-tips/carrageenan-natural-ingredient-you-should-ban-your-diet www.ewg.org/skindeep/ingredient/705315/PROPYLENE_GLYCOL/
www.latimes.com/science/la-sci-dietsoda11feb11-story.html
www.ncbi.nlm.nih.gov/pubmed/2202324
articles.mercola.com/sites/articles/archive/2016/01/20/titanium-dioxide-nanoparticles-health-risks.aspx
www.truthinaging.com/review/what-is-it-pegs
www.ncbi.nlm.nih.gov/pubmed/11800050
www.ncbi.nlm.nih.gov/pubmed/11766135
www.webmd.com/vitamins-supplements/ingredientmono-982-zinc.aspx?activeingredientid=982
pubchem.ncbi.nlm.nih.gov/compound/Sodium_D-gluconate#section=Top
www.britannica.com/science/polyethylene
articles.mercola.com/sites/articles/archive/2015/04/25/coconut-oil-toothpaste.aspx

Taming Time

There is so much to do during our day as busy moms. We need to take care of our family, the house, and hopefully ourselves as well.

What does your daily to-do list look like? Are you able to get it all done? Are you stressed when you are not able to fit it all in? Here are some thoughts to manage life as a busy momma.


1447784257571


My View

My hubby and I are both list makers. He has lists for his lists. Literally. The difference between him and I is that if I have things left on my to do list, it is a weight on my shoulders. A burden that I will carry until I either get it done, or decide that it should never have been put on the list in the first place.

For the first time in my life (ok, that’s an exaggeration, maybe just the first time in a while) I have not been able to do all that I want to do. My hubby tells me it is alright, he is impressed that I get as much done as I do. But this doesn’t help. I WANT to do it all!!

I want to homeschool, go to the gym, craft, make great dinners, bake my own bread, spend quality time with each of my children, snuggle on the couch with my hubby, write compelling blog posts, the list goes on and on and….

As I have been coming to terms with the reality that I just can’t do it all, I remembered hearing an analogy of how to prioritize your life. Maybe you have heard this before. It starts with a big jar or bowl. If you fill it with little pebbles first, and then put big rocks in last, it won’t all fit. But, if you put the big rocks in first, and then fill it with the little pebbles, it will actually all fit in the jar!


What To Do About It

Mountains.

These are the things that are non-negotiable. The true needs. The things that are required for existence. People over use the word “need.” I need to do this… I need to do that… No, no you don’t.

  • Feed and clothe my family (That is it, that’s all I really “need” to do. And maybe wipe them down every now and then.)

Boulders.

These are the really important things, but not a need. If it came down to it, I could stop or pause if I needed to.

  • Homeschool
  • Laundry (As in wash and dry. Putting them away is not as important. Life will not end with wrinkled clothes.)
  • Children’s extracurricular activities (Sports, arts, clubs, etc.)

Cobbles.

These are the things I know will help my attitude or my children’s attitude and in turn help me to be a better wife and mother. These are really the same level of importance as Boulders, but more self-focused.

  • Spend time in silence before the kids are up
  • Snuggle with my kiddos
  • Snuggle with my hubby
  • Exercise

Stones.

These are the things I want to do. More than likely, I will only have time for one of these.

  • Blog
  • Craft
  • Rest

Pebbles.

These are things I should do, but don’t necessarily want or have to do.

  • Clean (Nobody cares if my bookshelf is dusty or there are spots on the floor, but I personally would like to have it done.)
  • Laundry (As in fold them and put them away.)

Sand.

These are things I need to let go of and accept that this is not necessary in my current season of life.

  • Baking bread (But it’s sooo yummy!!)
  • Working in the yard (Trimming bushes and pulling weeds will have to wait.)


I know myself well enough to know that if I am overwhelmed, I shut down. So I made a list of a few things that can be done in about 5 minutes. These are “pebbles,” the little things that I fit in throughout the day.

  • Unload the dishwasher
  • Put a load in the washer
  • Put a load in the dryer
  • Dust a room
  • Throw away trash in the car
  • Hang up clothes in bedroom

Final Thought

I’m sure I have missed about a dozen things that belong on these lists. And most likely your list will not look just like mine. We all have different priorities of things that will keep us productive and calm. The important thing is to be intentional with your time. Know when to leave items off your to-do list. Go snuggle those babies!


xoxo

clock

How To Develop A Meal Plan

Ain’t nobody got time for that!!

This bit of bad grammar is brought to you by my desire to reduce the amount of time we spend in the kitchen. We are busy moms! We have babies to feed and kids to drive to practice and games to play outside (and maybe naps to take)!


1445888088334


Rules

For the way I do my meal planning, there are just two rules.

Rule #1 You have to have a crock pot and microwave. This is the one I love. It leaves the meat so tender that it just falls apart.

Rule #2 You have to be okay with leftovers. I prefer to cook 3 big meals and then reheat, rather than 7 small meals.


Steps

Step #1 Make a list of foods you already have on hand. Especially items that may be about to expire.

For instance, if you have a head of broccoli that has been sitting in your fridge for a week, then your first meal is going to be include broccoli. In this photo you can see that I have starred the kale and avocado letting me know that they need to be used. I hate throwing out food.


20151023_125119-01

Step #2 Make a list of meals that you would like to eat.

Obviously, choose meals that include what you already have. If you don’t have items already in your fridge, then it’s free game!

20151023_125305-01

Step #3 Schedule those those meals while considering if they will work with your family’s schedule.

We are not home Tuesday and Thursday afternoons before dinner time, so a casserole would not work on those days because no one will be home to put it in the oven. On those days we either use the crockpot or have leftovers warmed up in the microwave.


20151023_125825-01

Step #4 Write down a list of ingredients you will need to get.

Go through your recipes, or your mind, to make sure you have everything you will need on hand.

20151023_125927-01

Step #5 Find time to go to the store.

Remember to take the list with you!!


Tips

Tip! Plan a months worth of meals and then shop at a wholesale store.

Tip! Use fresh ingredients first and end with frozen meat and veggies.

Tip! Freeze unbaked casseroles if you want to prepare for more than a week at a time.

Tip! Roast veggies and put in storage containers to reheat with crock pot meals.


Hopefully this simplifies meal planning. Or you can leave all the work to me! Simply subscribe to Oh Lord Help Us with your email. Starting in January I will send you a month’s worth of meal planning, complete with recipes, shopping lists and price per serving breakdown.

xoxo


photo credit: Benjamin Faust

Making Room for a Growing Family

With our family (and my belly) growing, we needed to make some extra room for all these kiddos to be able to sleep and still have room to play. There is no better way to do this than with bunk beds! And nothing more fun! So we started looking around to see what our options were. Good Grief!!! They either felt like they were going to fall over, or I would have to sell my left kidney in order to afford it. Solution? Make it ourselves! I looked around for months on Pinterest to get ideas. Finally taking several features that I liked and compiling them to come up with our own plans. I’m quite proud of the result and am more than happy to share with you. At the end of this post I will give a list of supplies needed, but I’ll just go ahead and tell you the cost (because I can’t keep a secret when I’m excited). Grand total (including hardware, but not paint) was $219.30 (without tax). Isn’t that incredible?!?!? Bunk beds like this to be built would be about thousand bucks, no lie. And ours even have secret compartments.

bunkbed_removefan

First thing, if you have a ceiling fan, it’s gotta go. We don’t want any kiddos getting knocked in the head in the middle of the night.

bunkbed_headboard

This is the head board. It consists of:

  • 2-2 x 10 x 8 ft boards (our ceilings are 9 ft, so we didn’t need to cut these)
  • 5-2 x 6 boards cut to 38 inches
  • 2-boards cut from plywood 9 inches x 38 inches
  • 1-4 x 8 white hardboard cut to 38 inches x 88 inches

bunkbed_headboardback

Here you can see the back of the headboard.

bunkbed_hiddencubby

This is looking into what will be one of the hidden compartments.

bunkbed_footboard

This is the foot board. It consists of:

  • 2-2 x 6 x 8 ft boards
  • 3-2 x 6 boards cut to 41 inches

bunkbed_siderails

These are the side rails that will hold the mattresses. They consist of:

  • 4-2 x 6 board cut to 85.75 inches
  • 4-2 x 2 x 6 ft (these are what hold the platform for the mattress, please note that these are NOT centered)

bunkbed_headrails

These are the siderails that go at the very top.

  • 2-2 x 6 boards cut to 85.75 inches

bunkbed_attachrails2

Here we have attached the side rails. This is definitely a two (or maybe three) person job. Make sure your rails are level!!

bunkbed_installbase

Here is the mattress platform resting on the 2 x 2’s. Please note that we did add 2 x 2’s at the head and foot as an afterthought because it was not sturdy enough.

  • 2-4 x 8 OSB plywood cut to 40.75 x 75 inches, then cut notches at foot .75 x 5.5 inches

bunkbed_stairs

These are the bookshelf stairs to climb into the top bunk. It consists of:

  • 1-2 x 12 board cut to 55 inches
  • 1-2 x 12 board cut to 39.25 inches
  • 1-2 x 12 board cut to 39.5 inches
  • 1-2 x 12 board cut to 29.25 inches
  • 1-2 x 12 board cut to 19 inches
  • 1-2 x 12 board cut to 8.75 inches
  • 4-2 x 12 boards cut to 11 7/8 inches

Once built, the stairs were attached to the bed with “L” brackets.


bunkbed_shelves

We also put bookshelves in the headboard. The bottom shelf was not as deep as to allow room for the hinges to make the hidden compartment. These consist of:

  • 4-1 x 10 boards cut to 38 inches
  • 2-1 x 10 board cut to 38 inches and then ripped to 7 inches

bunkbed_complete

We of course added the all-important safety rail. It consists of:

  • 1-2 x 4 board cut to 85.75
  • 2-2 x 4 boards cut to 15 inches

All wood was purchased from Home Depot.

Extra things we added were the curtains, an LED battery powered touch light, and little fans.

The curtain rods and clips were from Target. The curtains I sewed myself. The inside fabric has a wonderful silver star pattern with a black background, from JoAnn Fabric. The lights (not seen) were from Lowes. The fans from Walmart.

All of the sections were primed and painted before final assembly. I used the same paint that was used on our trim throughout the house. It looks great, and I didn’t have to buy any additional paint.

Aren’t they great (if I do say so myself)!


Here’s the shopping list and price breakdown:

  • (12) 2 x 6 x 8 @ $5.28
  • (2) 2 x 10 x 8 @ $7.26
  • (2) 2 x 4 x 8 @ $2.92
  • (3) 2 x 2 x 8 @ $1.87
  • (2) 1 x 10 x 10 @ $22.26
  • (1) 4 x 8 white hardboard @ $8.98
  • (2) 4 x 8 OSB plywood @ $7.05
  • (3) 2 x 12 x 8 @ $8.59
  • (2) Hinges 2 pack @ $2.97
  • 1 lb screws 3″ $7.94
  • 1 lb screws 2.5″ $9.37
  • (5) “L” brackets 4 pack @ $2.67

Total: $219.30


Have fun!!


Learn From Others. Be Encouraged. Repeat.

I think it is so valuable to surround oneself with positive, encouraging, and challenging people. And then to learn from them. There is so much that we can learn from others. When we moved to South Carolina a year and a half ago one of the first things we did was join the YMCA. It has had a tremendous positive impact on our family. And part of that is because I met Chris my first week being there. Right away she made me feel so welcomed and talked with me like she had known me for years. Over the next year she challenged me physically and nutritionally to be stronger and healthier. And it’s her fault that I started competing in triathlons! While she is being an encouragement to others, she is a wife, mother, health coach, fitness intstructor, and business owner. This is definitely someone that I want to learn from, and she was generous enough to let me interview her so that you can learn from her as well.


What all are you juggling at the moment?

I’m teaching fitness classes which is an ongoing thing.  Also building my business which includes planning and customizing online detox programs, updating the website, marketing, and making connections with other local business owners with a simular passion. And for the past year I’ve been studying functional nutrition online at Replenish which is part of Holistic Nutrition Labs.

What does a typical day look like for you?

I start with a workout either on my own or teaching a class. Then it’s a couple hours working on the computer building the business. Once it’s 3 O’Clock, it’s all about the kids! Picking them up, completing homework, going to activities, and cooking dinner. And of course mixed in there is grocery shopping, and cleaning. I don’t have a house cleaner yet!

We can’t do it all, and have to sacrifice certain things at times. What do you sacrifice?

Well, I’ll tell you what I don’t sacrifrice. I don’t sacrifice my workouts, or cooking for my family, and my kid time. What I do sacrifice is building my business. There are so many ideas that I have and want to do, but I have to say it’ll come later because there is not the time for it right now. It’s hard sometimes though, because I get real excited and I’m passionate about it and want to try something, but then I am overbooking myself and I get stressed and end up taking it out on the family. It’s a constant going back and forth and trying to find and keep that balance.

Is your house clean right now?

It’s picked up, but there is dust on the baseboards. My husband appreciates organization, so to honor him I keep it picked up. But my junk drawer is junky!

Do you have any money saving tips?

I shop around different grocery stores. Mainly I go to Trader Joes, Publix, and Wholefoods and shop whatever is on sale and in season. This means that sometimes I am meal planning on the fly. Also I will buy in bulk for things that I know we will use, but if I’m making a new recipe I will go to Earth Fare to their spice section and just buy what I need for the recipe in case I don’t like it. That way I don’t buy a whole bottle of a spice that I would maybe not use before it expired. And we don’t eat out. I’d rather spend that money on an organic meal to make at home. I guess I spend a lot of time at grocery stores!


It’s encouraging for me to know that I am not alone in this universe with wanting to do more than I have the time or energy for. It’s healthy to prioritize, and it’s okay to let things further down the list be neglected at times.

If you would like to connect with Chris (and you should) to learn and be challenged, you can visit her website at www.nourish2live.com, or on Facebook.

image

Proudly powered by Wpopal.com